…because I’m a Tech Dummy. If I’d known it was so straight-forward, I would have done this a lot sooner. There were a few people who made the process seem a lot more complicated and me feel even dumber but once a dear friend pointed me in the right direction, it was all good.
Step 1: Download All Your Website Files
Use FTP transfer and save a copy of all your website files on your computer hard drive.
The File Transfer Protocol (FTP) is a standard network protocol used for the transfer of computer files from a server to a client using the Client–server model on a computer network. – Wikipedia
How do you FTP? There are a number of programs you can use. These are some of them:
I used Filezilla so I’m just going to give you the instructions for this program. The others should function similarly, but if there are differences, you’ll have to go look them up yourself.
- Download Filezilla and install it onto your computer.
- Run Filezilla.
- Click the “File” drop-down menu in the top left hand corner and select “Site Manager”.
- Click “New Site” and give it a name.
- Insert the following values:
- Host: this is usually your domain name or server IP address. It looks something like username.hostname/domain.com. The details should be available in your hosting account if you already have an FTP account. If not, you can create one in there. Record your host name, user name and password.
- Port: 21 (usually)
- Protocol: Select “FTP – File Transfer Protocol”
- Encryption: Use the default setting
- Logon Type: Normal
- User: your FTP account user name (which you should have recorded when you created your FTP account).
- Password: the password you set when you created the FTP account.
- Click “connect”. Now you can download any files you want to your computer.
Step 2: Download your SQL database
In your control panel, there should be an option to open “myPHPadmin”. Your user name and password are the ones you created when you set up your SQL database. Unfortunately, if you’re like me and you used one of those “one-click” blog setup programs, you won’t know what it is.
There should be a tab under the admin panel in your hosting account that allows you to set up and/or manage your SQL databases. It should list all your SQL databases with user names and an option to change your password. If you don’t know the password, you can change it to a new one in this panel and it shouldn’t prompt you for an old password.
Another alternative if to look for the wp-config file (that’s what it’s called if you have a wordpress blog). If you’ve downloaded your website files to your computer, you go to the directory with all your website files and look for wp-config PHP file.
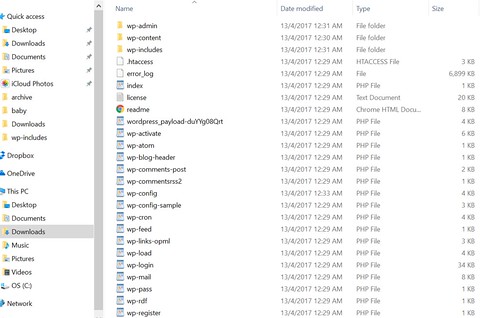
Open the file in wordpad or some text editor program and look for the following section which will have your login details:
// ** MySQL settings – You can get this info from your web host ** //
/** The name of the database for WordPress */
define(‘DB_NAME’, ‘SQL Database name‘);/** MySQL database username */
define(‘DB_USER’, ‘SQL Database login name‘);/** MySQL database password */
define(‘DB_PASSWORD’, ‘SQL Database Password‘);
If you have multiple blogs, there should be one SQL database for each blog. If you used the “one click” setup for all of them, you probably won’t know which database belongs to which blog. Inside myPHPadmin, there should be an option to open your “posts” file which should list some terms that are recognisable from your blog posts.
Step 4: Transfer your domain to your new hosting account
Do NOT begin this step until you have every file you need from your website downloaded to your computer. I was told domain transfers could take a few days so I started the process while I had the Filezilla going in the background. Unfortunately, the domain transfer took place faster than it took for me to download my website files and I got locked out of the FTP account.
Long story short, I still had a lot of files on my old hosting account that hadn’t been downloaded and I had to zip them and download them in batches. It’s still doable but slower and more tedious. Apparently, you can Gzip the whole folder with your website files but I couldn’t figure out how to un-Gzip them after I downloaded them to my computer.
Your hosting account should have a help section on how to transfer your domain. The steps should run something along the following:
- Login and access the domain manager tools of your current registrar.
- Update your contact info (particularly your e-mail address) so that your new host can reach you with important information both during and after the transfer process.
- Ensure privacy options are disabled for the transfer process. You can re-enable them when your domain is successfully transferred to your new host.
- Update the nameservers to point to your new host. Should be something like: NS1.hostname.COM and NS2.hostname.COM. The DNS change can take anywhere from a few hours to several days to propagate. Once it is finished you will be able to complete the transfer process.
- Unlock your domain name.
- Acquire your “transfer EPP code,” or authorization code. This should be provided to you. Copy this code down and login to your new registrar to initiate the transfer.
- Go to your new host and find the domain manager tab. Type in the name of the domain you want to transfer.
- Enter the EPP code you received from your previous registrar and click continue.
All you have to do now is wait for the transfer to be complete.
Step 5: Create a new SQL database
In your new hosting account, create a new SQL database for your blog.
Step 6: Import your SQL database
Open myPHPadmin for your new SQL database. Click “import” and select the SQL file you downloaded from your old host.
Step 7: Edit the config file
Remember the wp-config PHP file you were looking for in STEP 2? Now you have to open it and change the DB name, DB user, and DB password to the new SQL database you created in STEP 5. Save the file.
Step 8: Upload all your files to your new host
Set up a new FTP account with you new host and upload all your website files to your new host.
If everything has been done correctly, and your domain has been transfer, you should now be ready to start blogging again.
